This page describes a simple method I learned recently for measuring the locations of your bike's contact points (handlebar and saddle) relative to the bottom bracket. This is useful because quantifying these locations allows you to better compare different bike fits, or transfer a fit from one bike to another.
Prior to doing these measurements, I just adjusted my bike until I was happy with the fit. This works fine for one bike, but doesn't help if you want to set up a second bike the same way, or want to understand why a different bike feels better or worse.
I learned this method from Allen Kuo, who runs Clubhouse Velo Fit Studio in San Francisco and developed the excellent XY Bike Calc web tool.
Overview
Our goal is to describe the positions of the bike saddle and bike handlebars relative to the bottom bracket, using X and Y measurements, as shown in this helpful diagram from the XY Bike Calc guide:
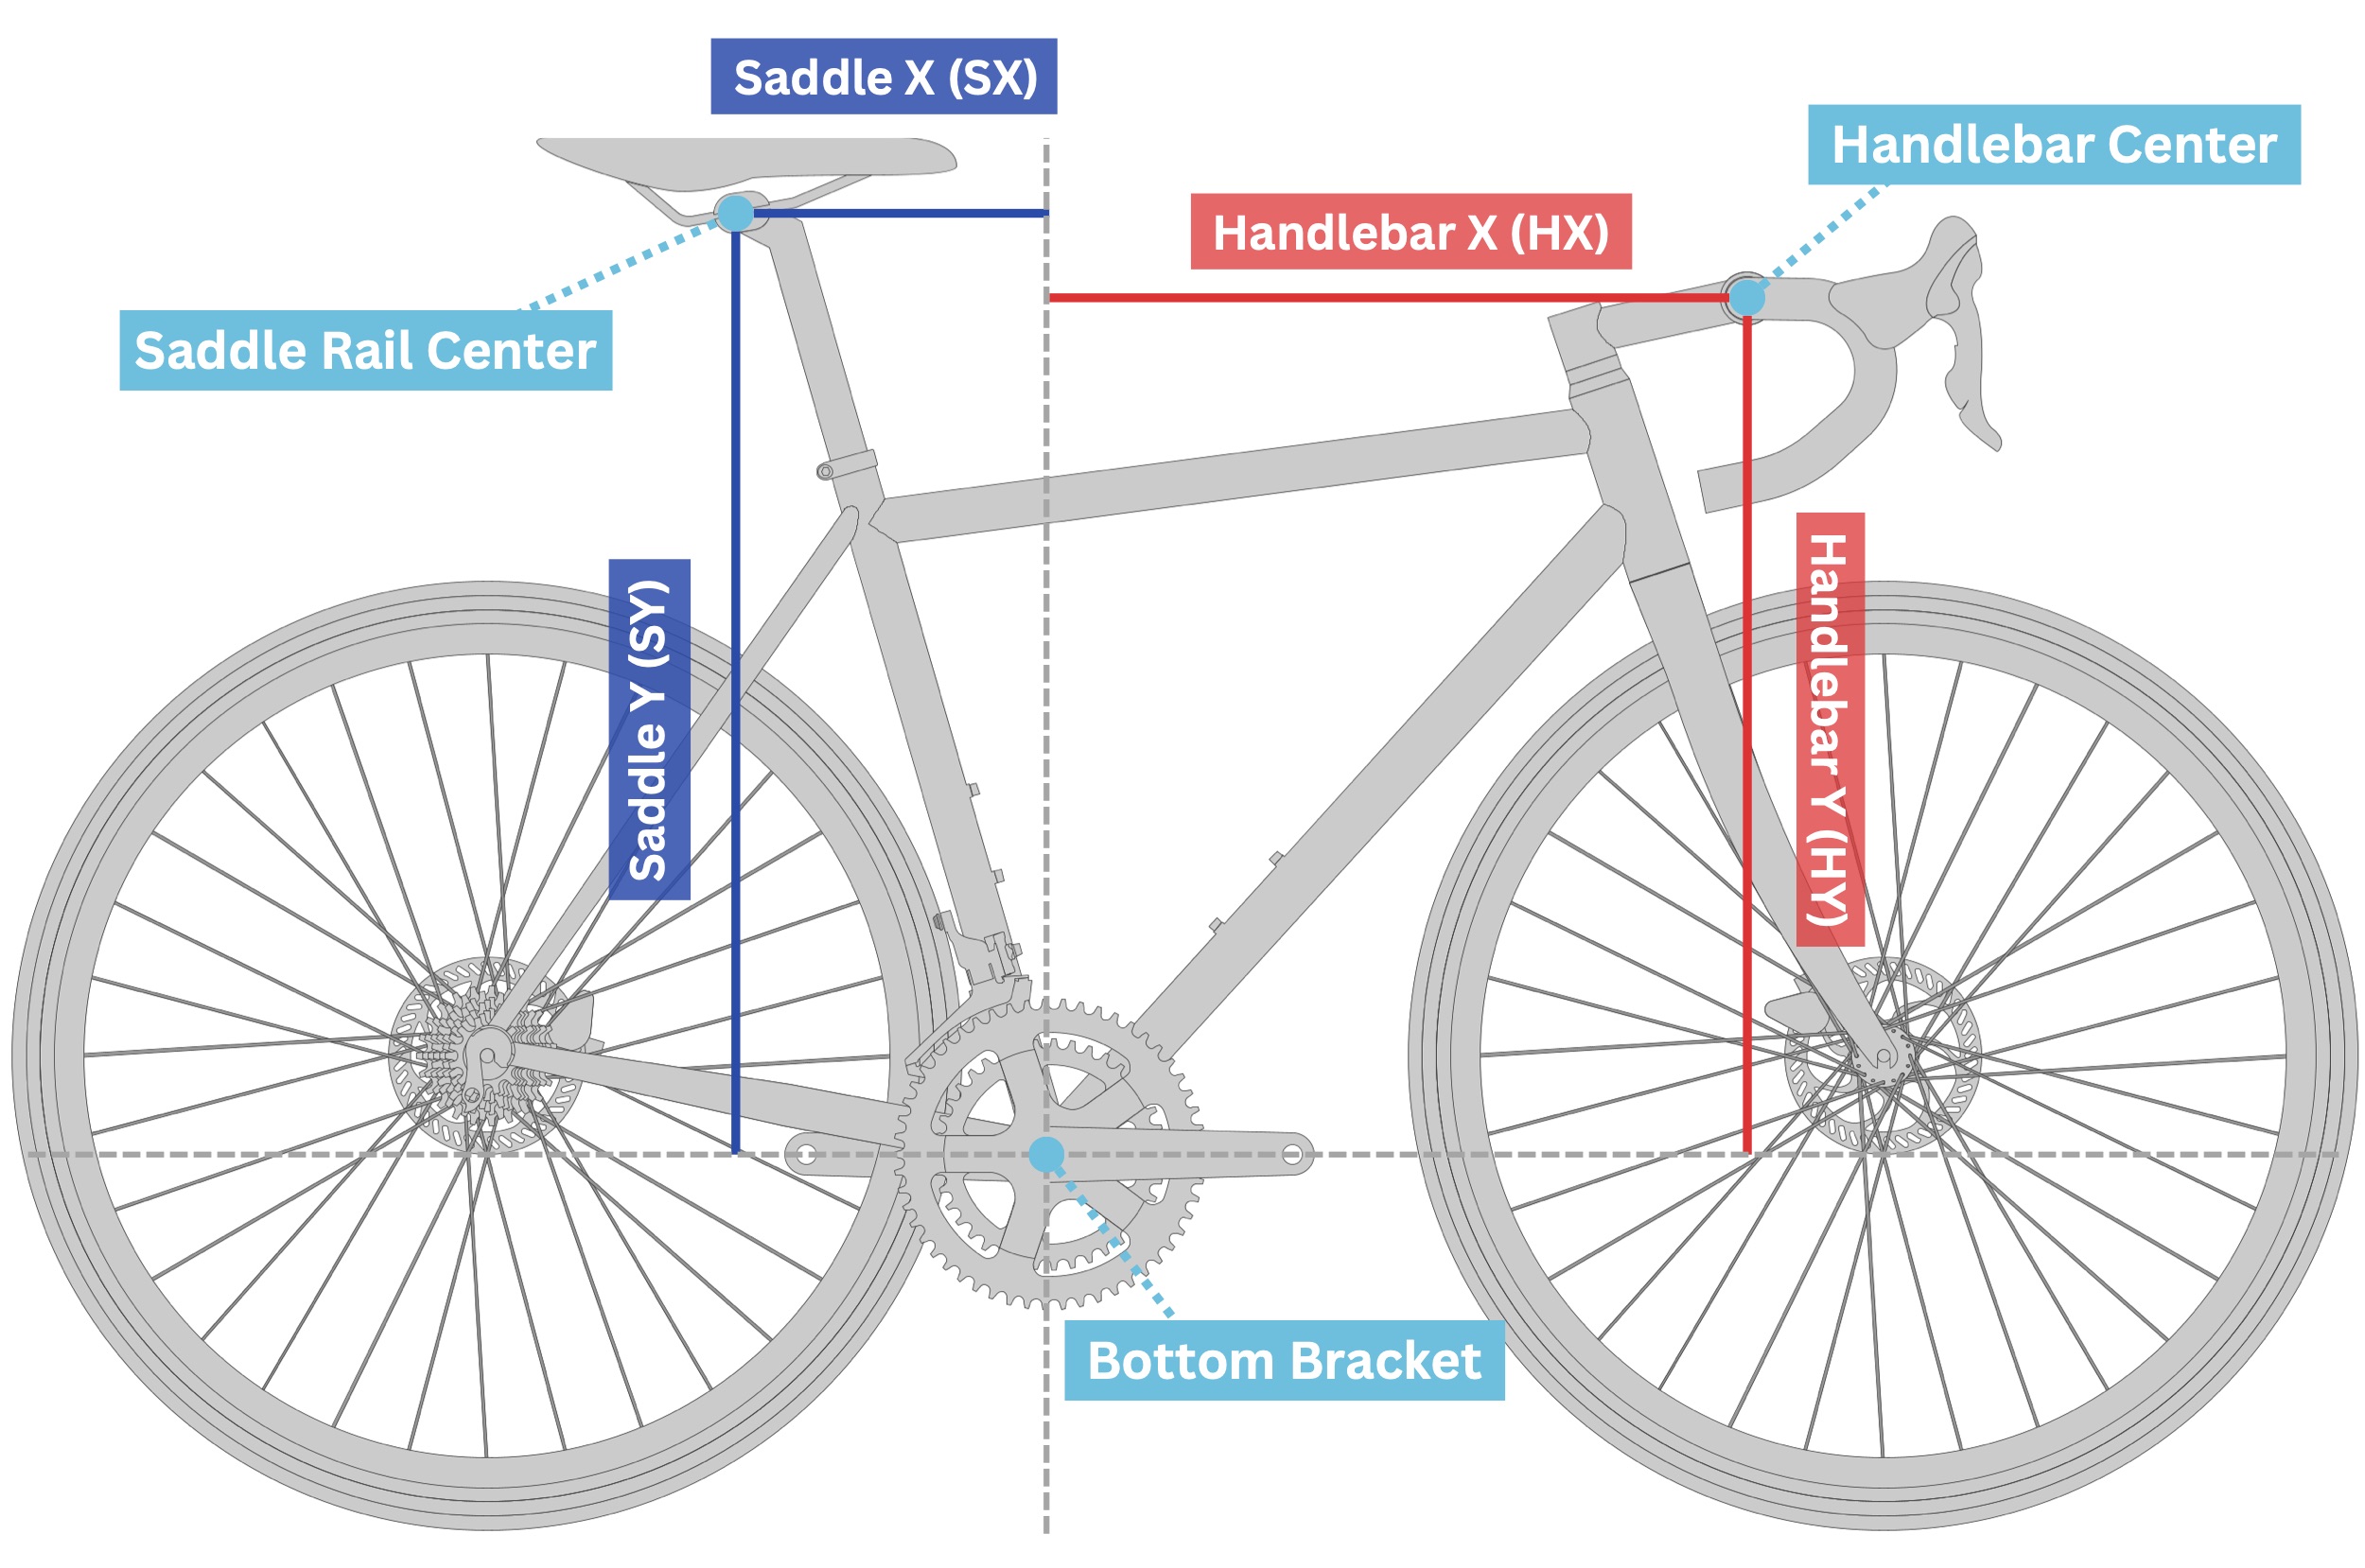
The saddle is measured at the center of the saddle rails, while the handlebars are measured at the center of where they are clamped by the stem.
Tools needed
- Small tape measure. I had a small 6 ft / 2 m tape measure from school that was perfect for this.
- Self-leveling line laser. I bought this one from Amazon for about $16.
- Something to stand the bike upright. This method will be more accurate if the bike is close to vertical.
- Optionally, a small tripod or other adjustable base for the line laser. I just stacked boxes and other small objects to position the laser where I needed it.
Setup
Set the bike up so that it is standing upright.
Next, check that the bike is level: Turn on the laser and align the laser line with the axles of the bike. The axles should be level with each other; if not, adjust how the bike is set up. (The laser should be self-leveling throughout this entire process, not locked.)
Then, reposition the laser so that the center point is aligned with the bottom bracket of the bike. Try to set up the laser so that it is aimed square to the bike rather than from an angle off-center.
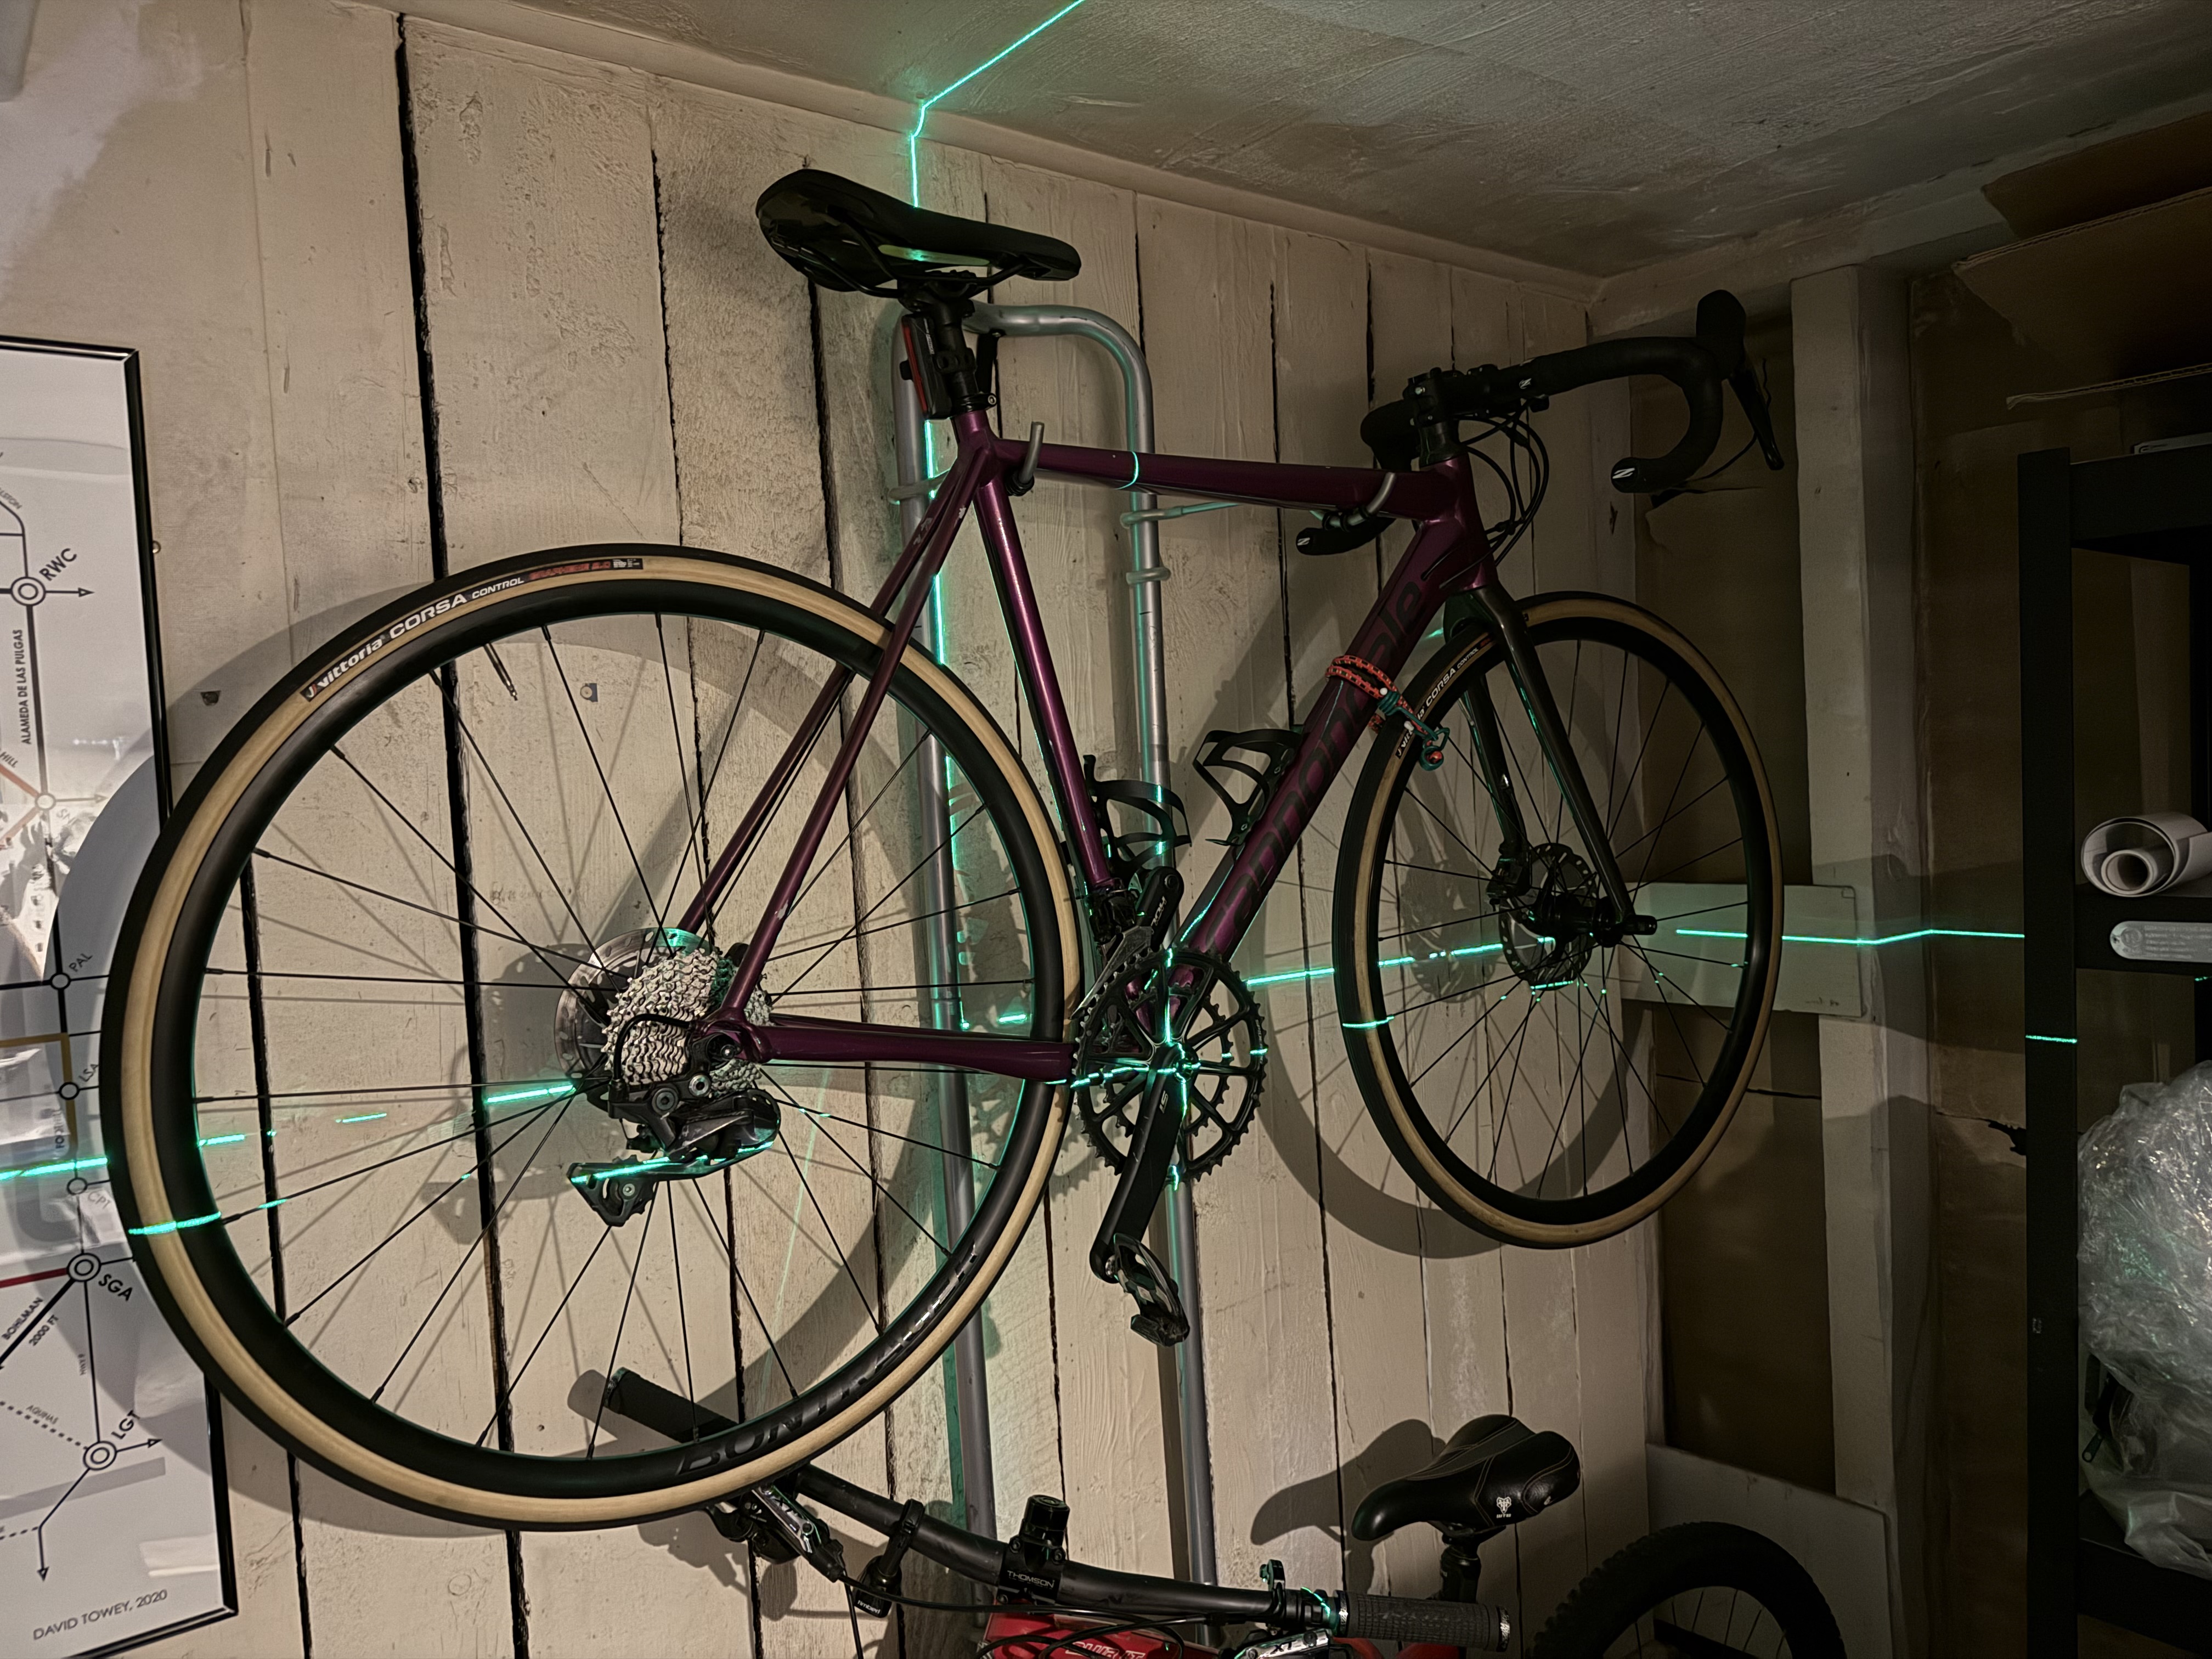
Here's what my setup looked like:
Measurements
Use the tape measure to measure the positions of your saddle rail center and handlebar center from the vertical and horizontal laser lines.
I just eyeballed the angle of my tape measure as best as I could and the results seemed pretty repeatable.
These were my resulting measurements:
| Point | X | Y | Comments |
|---|---|---|---|
| Saddle Rail Center | 178 mm | 622 mm | |
| Handlebar center | 443 mm | 604 mm | These bars have 74mm reach |
I then plugged my numbers into the Bike Position Simulator on XY Bike Calc to make sure things looked right:
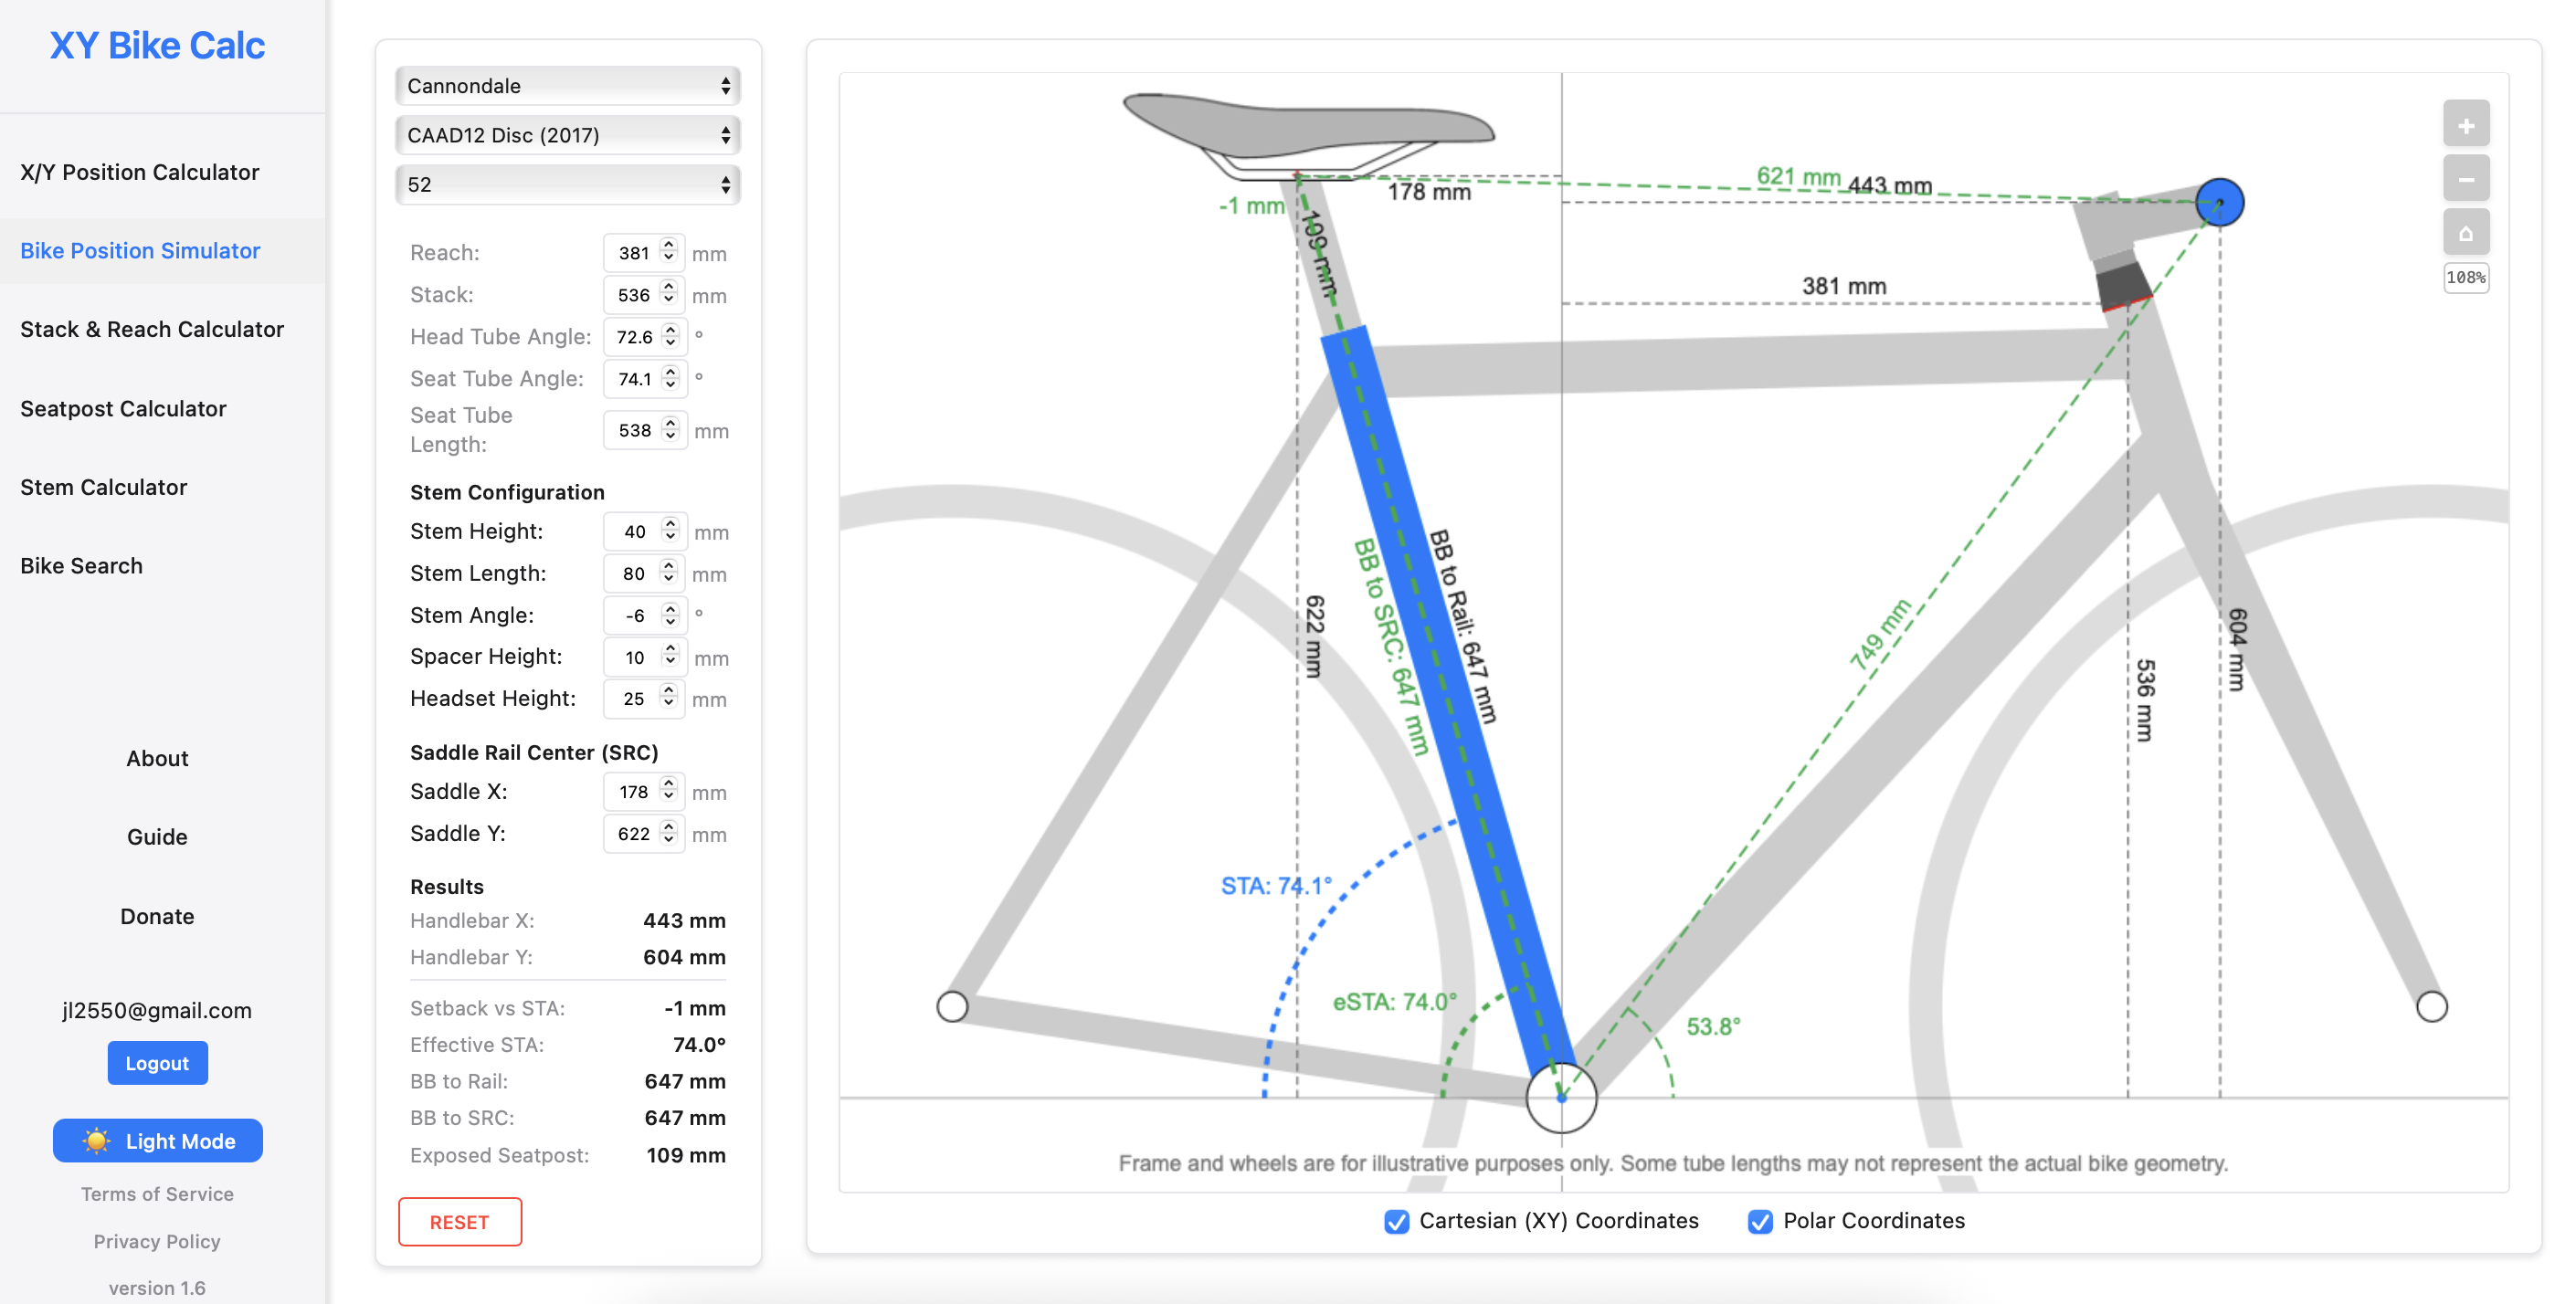
Now, I know pretty accurately how my bike was set up at this point in time.
Transferring to another bike
My main motivation for doing this was to transfer my fit from my Cannondale CAAD12 to the Trek T1000 tandem that Sharlene and I bought recently. I'm pretty happy with my fit on the CAAD12, which I've gradually dialed in over this past season of riding. Setting up the tandem is a great use case for this method because it's so cumbersome to take out and ride by myself. It's much easier to use these measurements to set it up indoors rather than spend a lot of riding time adjusting my fit through trial and error.
First, I set up the tandem bike with the laser lines centered on the bottom bracket:
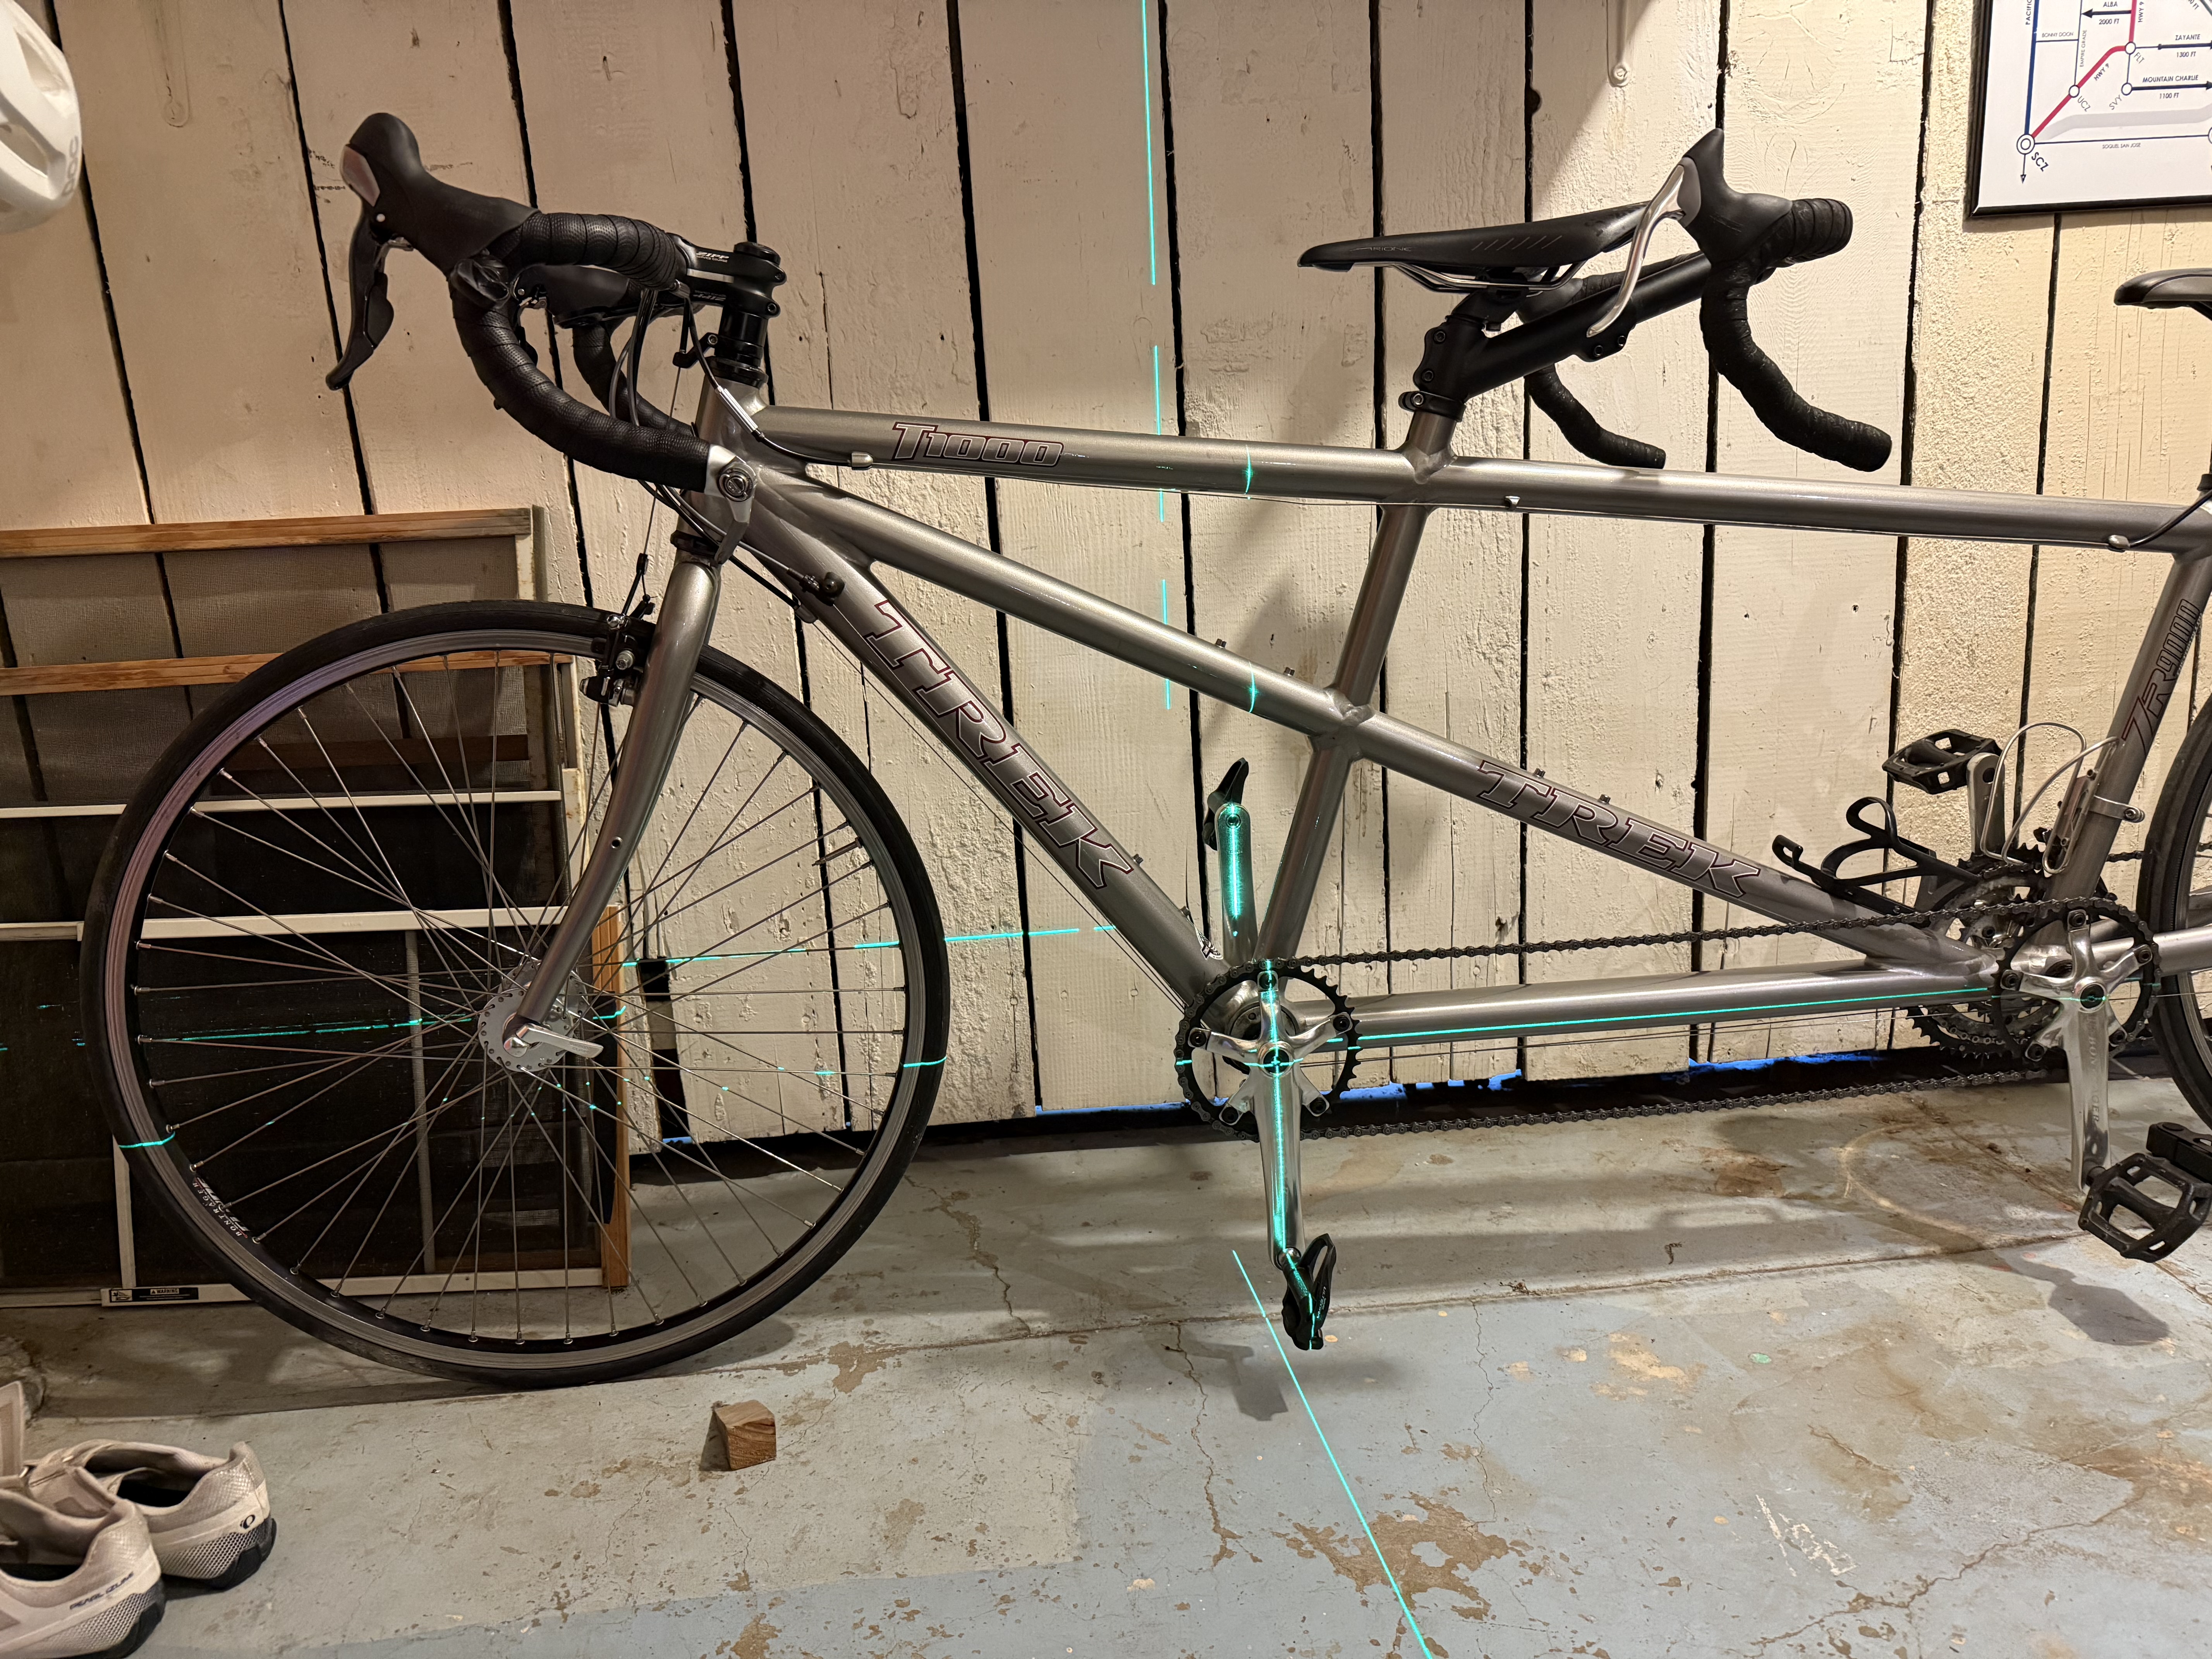
Then, I could simply measure the saddle and handlebar positions and then adjust to get as close as possible to my target position.
These are the numbers I ended up with:
| Point | X | Y | Comments |
|---|---|---|---|
| Saddle rail center | 185 mm (+7 from CAAD12) |
612 mm (-10 from CAAD12) |
Cranks are 10mm longer on Trek. Can't go forward more due to setback seatpost. |
| Handlebar center | 432 mm (-11 from CAAD12) |
650 mm (+46 from CAAD12) |
Bar has a little more reach, ~85 mm vs. the CAAD12's 74 mm |
So I was able to get pretty close to the CAAD12's position. The main differences were that the Trek's bars ended up a bit higher, and the saddle was very slightly farther back.
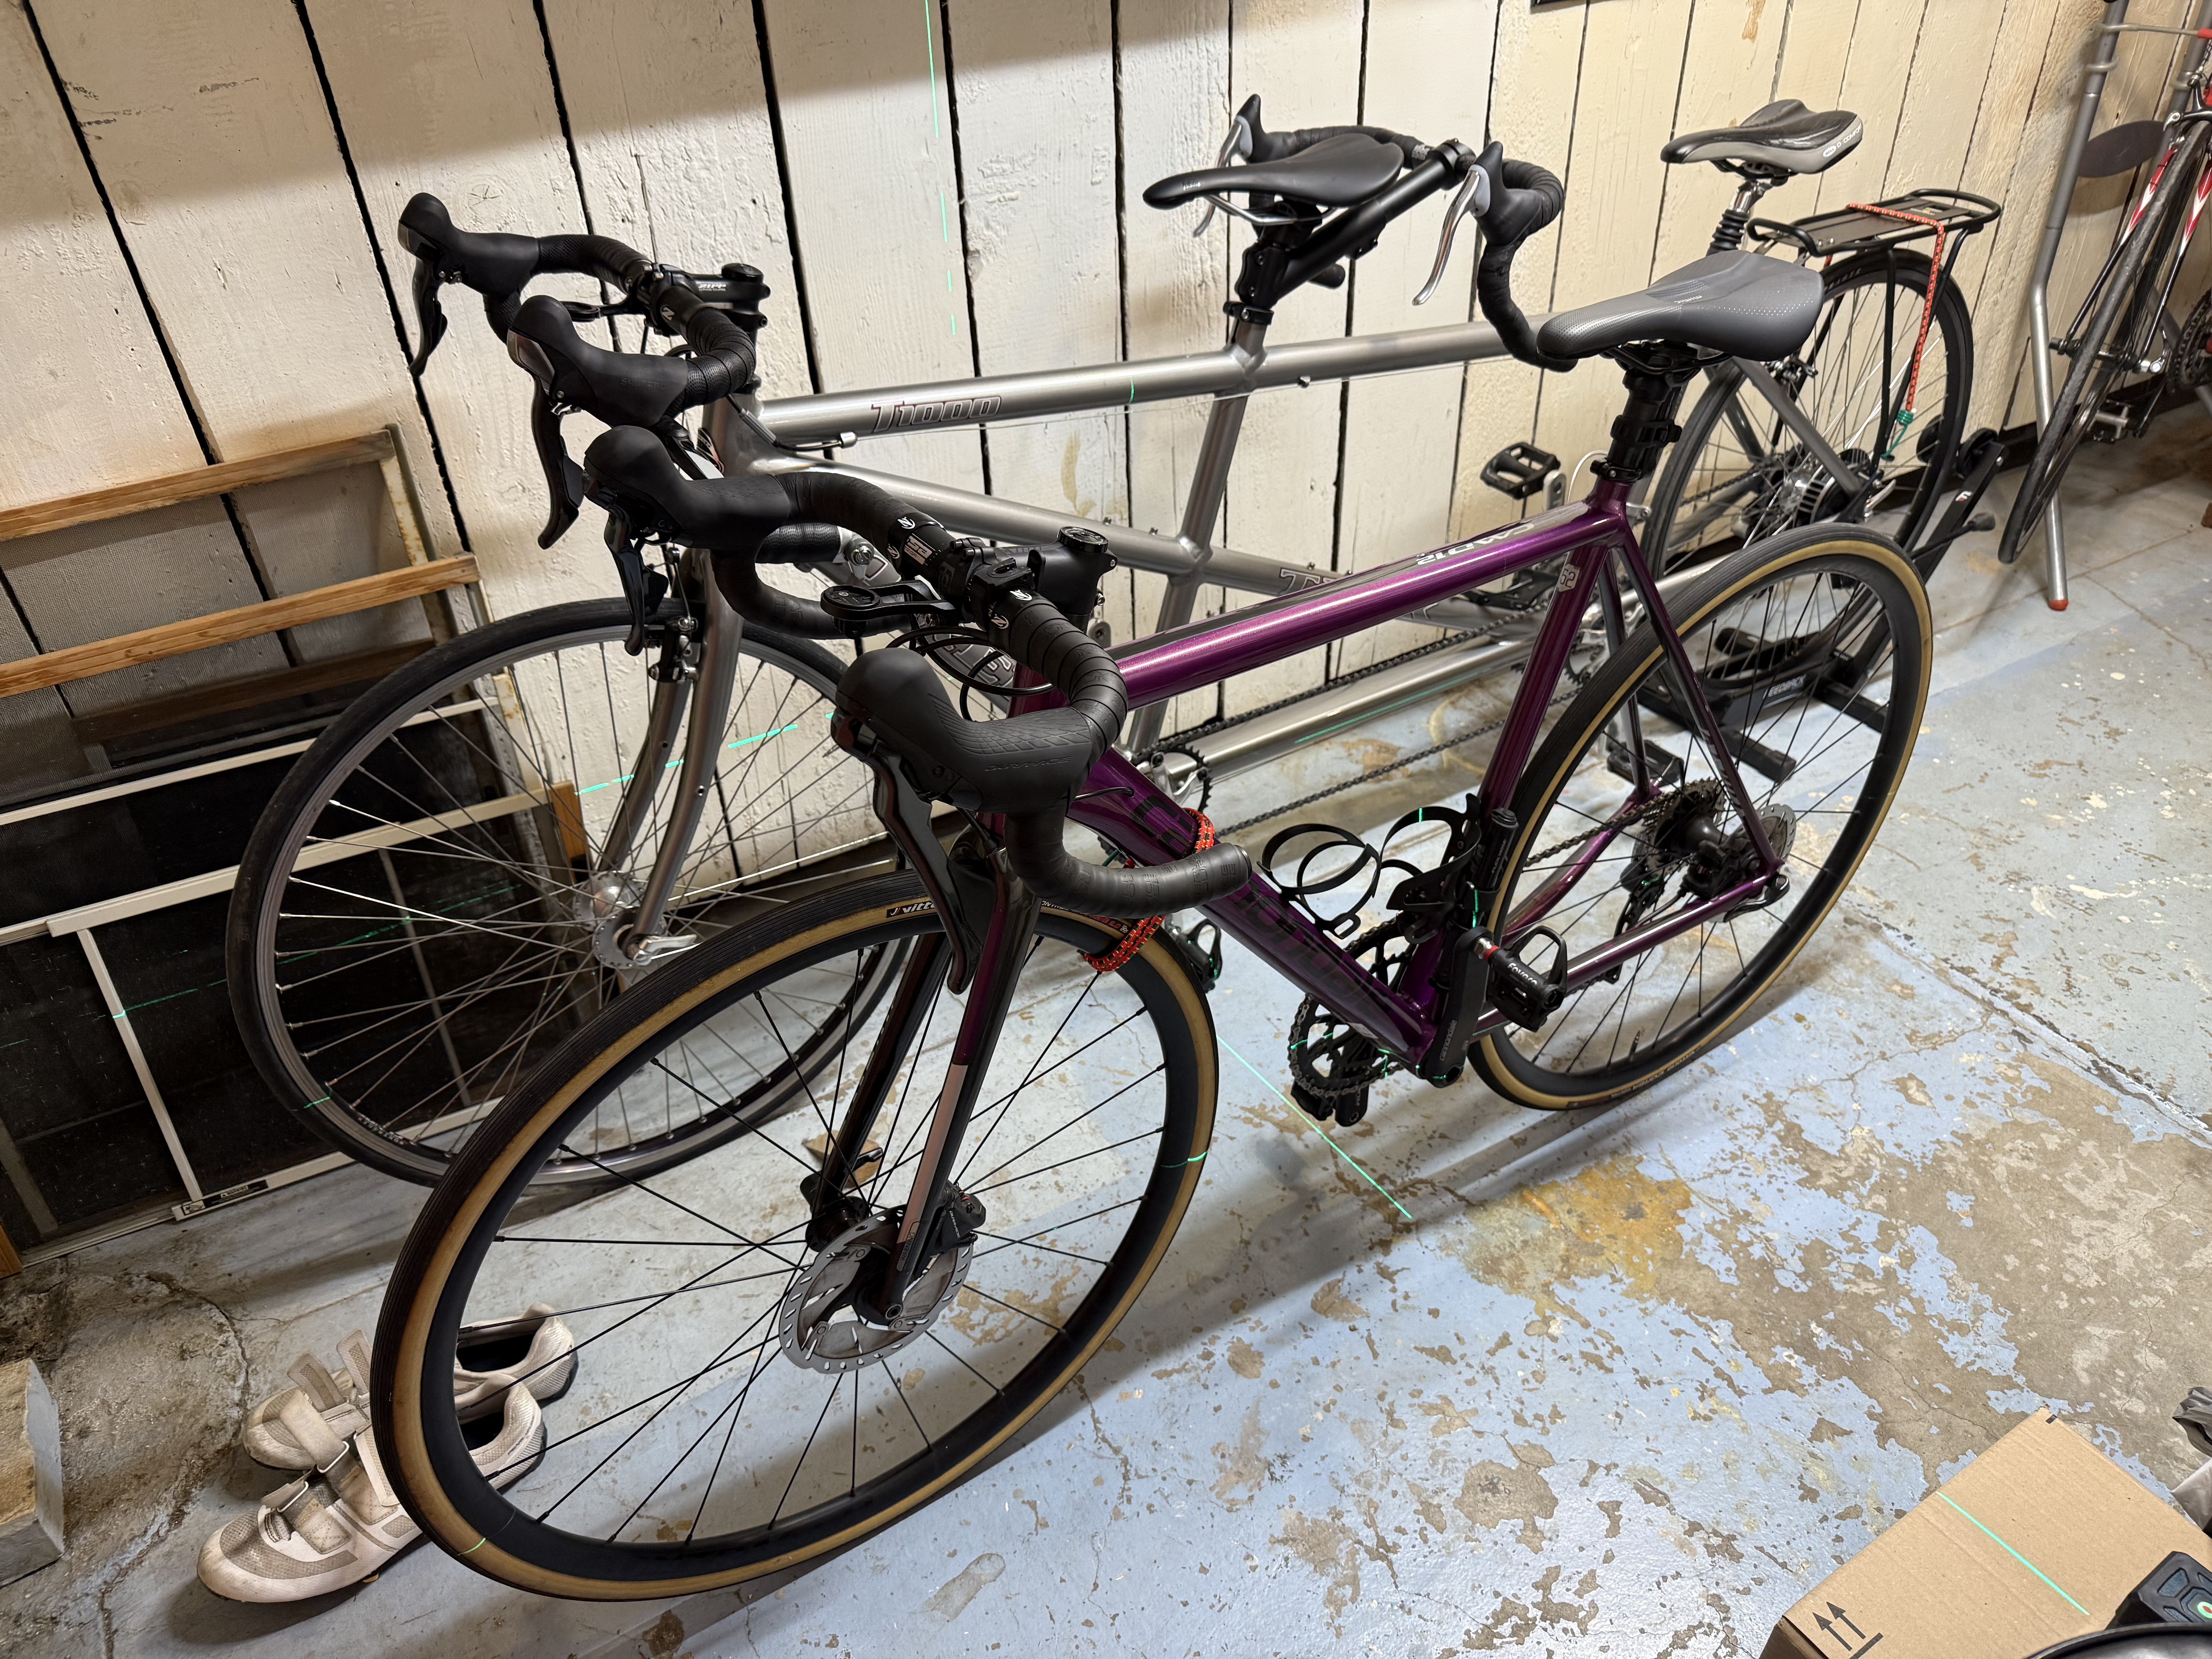
We took the tandem out on our first longer ride this past weekend and I didn't have to make any fit adjustments, so I think this method worked pretty well!
